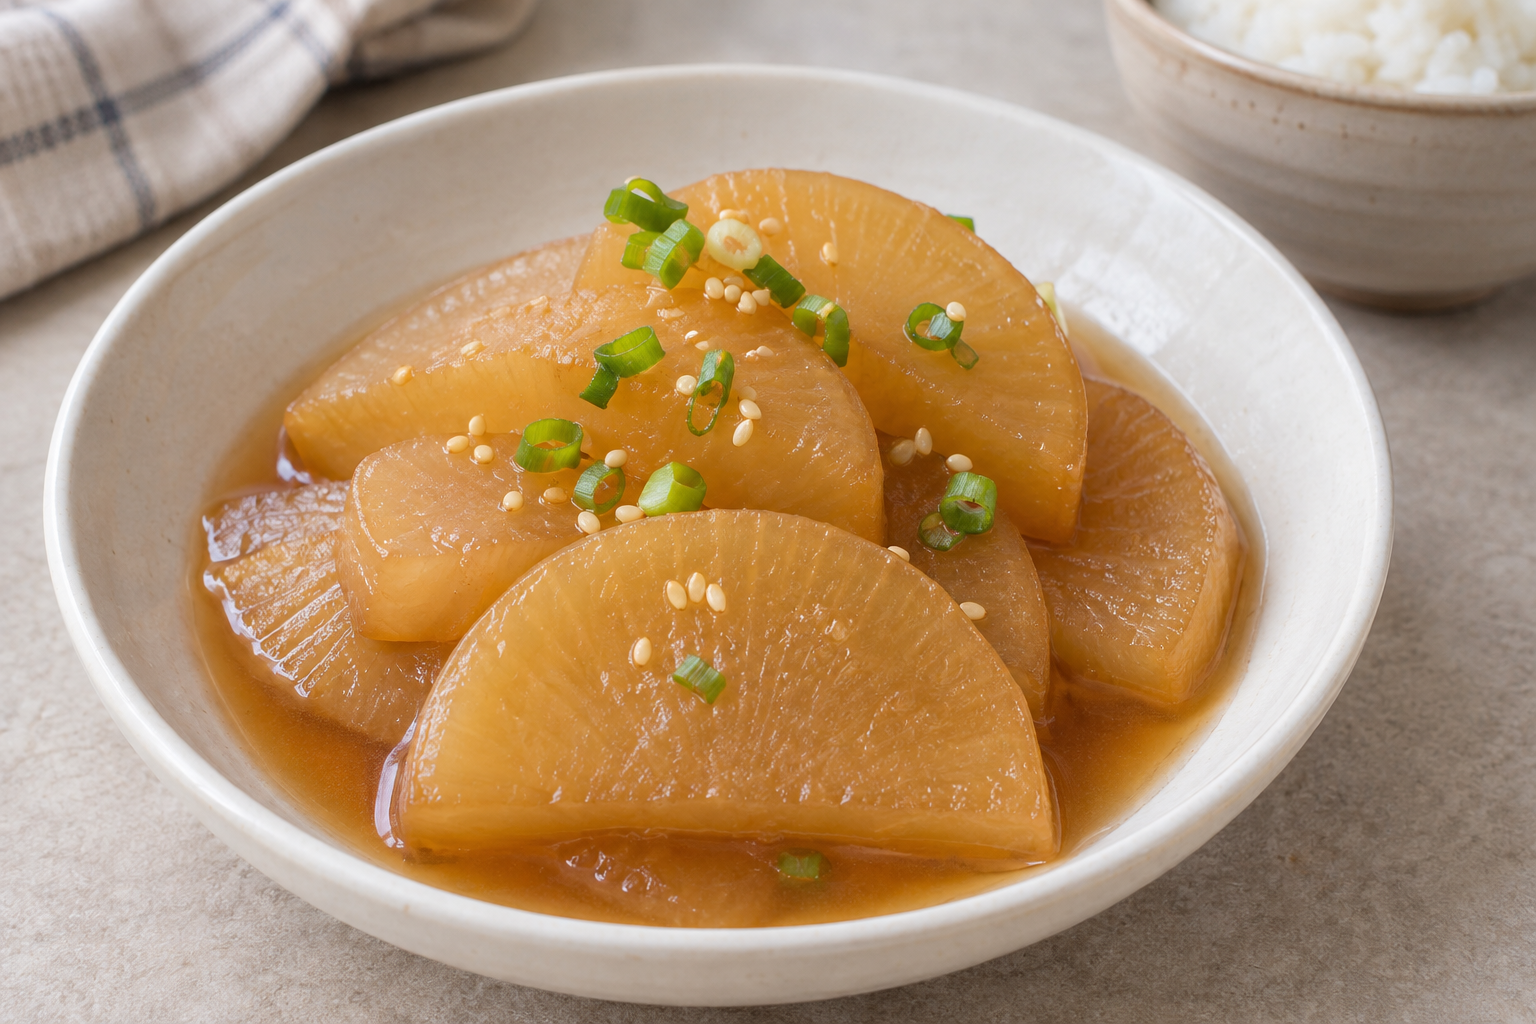
Mu jorim is a Korean braised radish side dish. This mild version uses 400g of prepared white Korean radish, a measured amount of soy sauce, garlic and scallion, without chili powder or fish. The useful distinction is between cooking the center and concentrating the broth: a dark surface does not tell you that the middle is tender.
Yield: 2–3 small side-dish servings. Planning time: about 10 minutes preparation and 20–30 minutes cooking, sometimes longer depending on the radish, pan and heat. Check the thickest piece rather than treating the clock as a doneness test. This is a cooking guide, not a report of a personally cooked or tasted meal.
한국어 레시피 보기 → · All four images are AI-generated cooking illustrations, not photographs documenting this recipe being tested. Follow the written measurements and center-tenderness checks rather than the exact number or color of pieces in the images.
Ingredients · Method · Troubleshooting · Half or double batches · Storage
Ingredients for 400g of prepared radish
- 400g Korean radish, weighed after trimming and peeling tough skin
- 250mL water, plus extra hot water as needed during cooking
- 20mL regular brewed soy sauce: 1 tablespoon plus 1 teaspoon
- 6g sugar and 5g minced garlic
- 20g scallion, white and green parts separated
- Optional finish: 5mL toasted sesame oil and about 1g toasted sesame seeds
A tablespoon here is 15mL and a teaspoon is 5mL. Weigh the radish instead of using “half a radish,” since sizes vary. Use regular brewed soy sauce rather than dark soy sauce for color or Korean soup soy sauce as a direct volume-for-volume swap. Saltiness differs by product. For more control, begin with 15mL soy sauce and reserve the last 5mL until the radish is cooked and you can taste a cooled sample.
Plain water keeps this version free of added fish stock. A stock cube, anchovy broth or fish sauce changes both seasoning and allergen considerations. Omitting the optional sesame finish does not require changing the cooking water.

Choose the radish and a pan that fits a shallow layer
Look for firm white Korean radish, commonly labeled mu or moo. Wash it and trim damaged parts; peel tough skin thinly. Weigh the usable pieces after trimming. If a cut section has extensive dry or spongy tissue, exclude that portion from the measured batch. Daikon is a possible substitute, but its moisture and cooking behavior can differ, so check it sooner and rely on tenderness.
Use a lidded, heavy-bottomed shallow pan about 22–24cm across. The pieces should fit in close to one layer. A much wider pan loses water faster, while a narrow pot with a tall stack gives you uneven contact with the broth. The initial 250mL water is a starting quantity, not a promise that no more will be needed. The radish does not have to be completely submerged; keep a shallow pool visible during the covered simmer.
1. Cut even 1cm slices and mix the braising liquid
Set the washed radish on a stable, flat cut surface. Cut slices about 1cm thick, then make half-moons or pieces roughly 3–4cm wide. Quarter a particularly broad radish while keeping the thickness consistent. Thin tapered edges will soften sooner than thick centers, so avoid mixing very thin scraps with thick slabs in the same batch.
Mix the 250mL water, 20mL soy sauce, 6g sugar and 5g garlic. If using the reserved-soy-sauce approach, put only 15mL soy sauce in this mixture. Slice the scallion whites and finely chop the greens. This basic method does not call for salting the raw radish or frying it in oil first.

2. Arrange the radish and simmer gently under a lid
Lay the radish in the pan with as little overlap as practical. Add the mixed liquid and scallion whites. Bring it to a simmer over medium heat, then lower to medium-low and cover. Aim for steady small bubbles rather than a vigorous boil that knocks the pieces together.
Allow roughly 15–25 minutes for this covered stage, with a first check of the liquid after about 10 minutes. If the bottom is nearly dry while the center remains firm, add 30mL hot water, cover again and continue. Add water before the garlic and soy mixture scorches; adding soy sauce instead will make the finished dish progressively saltier.
If some pieces overlap, exchange their positions during cooking. Turn them carefully once with a broad spatula when needed. Repeated stirring is unnecessary and can break softened edges. Keep enough liquid at the bottom to sustain a gentle simmer, adjusting the heat as well as the water.

3. Test the center of the thickest piece
Start checking at around 15 minutes. Push a chopstick or small knife tip into the center of the thickest piece. If the outside gives way but the middle offers a distinct hard stop, maintain a little broth, replace the lid and cook another 3–5 minutes before checking again. You want a center that yields easily while the piece still holds together when lifted.
A brown outside is partly the effect of soy sauce and is not proof of a tender center. Likewise, a pale piece can be fully cooked; there is no need to keep reducing it just to imitate a darker photograph. Lift out a small sample, let it cool enough to taste safely, and assess the seasoning before adding anything else.
4. Reduce excess broth only after the radish is tender
Once the centers are tender, remove the lid. If there is still a lot of liquid, simmer uncovered over medium-low heat for about 2–5 minutes, watching closely. Stop with a few spoonfuls of light broth remaining. This recipe does not need a sticky syrup or a dry pan.
If you reserved 5mL soy sauce, add only as much as the cooled taste check calls for and simmer briefly. You do not have to use the entire allowance. Turn off the heat and add the scallion greens and optional sesame oil and seeds. Gently move the pan or use a broad utensil instead of stirring hard. Serve a small portion beside rice with a little broth, as preferred.

Troubleshoot firm centers, saltiness and broken pieces
- The liquid disappears before the center softens: add 30mL hot water, lower the heat if needed and cover again. Check whether the pieces are thicker than 1cm. More soy sauce does not solve undercooking.
- The radish is tender but the pan is watery: reduce briefly with the lid off. If the pieces are already fragile, lift them out first, reduce the liquid on its own and then combine gently.
- The broth tastes too salty: stop reducing it. Add a little water, warm gently and taste again. Sugar can mask saltiness but does not remove salt. Serve less broth or divide the portion if further dilution would overwhelm the dish.
- The edges break apart: reduce vigorous boiling and repeated turning. Broken pieces cannot be made firm again; lift them with a broad spatula and stop cooking once the centers are done.
- The bottom scorches: transfer the unburned pieces to a clean pan without scraping in the burned layer. Adding sugar or soy sauce will not reverse a burned flavor.
Half batches, double batches and an optional spicy version
For 200g radish: begin with 125mL water, 10mL soy sauce, 3g sugar, 2.5g garlic and 10g scallion. The optional finish is 2.5mL sesame oil and 0.5g sesame seeds. Use a smaller pan so the broth is not spread too thin. With the same slice thickness, cooking time will not simply halve.
For 800g radish: start with 500mL water, 40mL soy sauce, 12g sugar, 10g garlic and 40g scallion, with an optional 10mL sesame oil and 2g seeds. Splitting the batch between two pans makes it easier to preserve the shallow-layer method. Do not pile twice the radish into a small pan and assume the original timing still applies. Replenish evaporated water as needed without repeatedly adding seasoning.
For a spicy variation, begin with 1/2 teaspoon gochugaru in the liquid for the 400g batch. Treat that as a separate choice rather than an ingredient required in this mild version. Gochujang, fish sauce and powdered broth introduce extra salt and potentially different allergens; do not add them while keeping all other seasoning unchanged.
Allergens, cooling and reheating
Regular soy sauce commonly contains soy and wheat, and the optional finish contains sesame. Check ingredient and cross-contact labels if an allergy matters. Gluten-free soy sauce is not automatically identical in saltiness, so the reserved-seasoning approach remains useful.
Divide leftovers into clean shallow containers, cool promptly and refrigerate within two hours of cooking. Following the Food Standards Agency’s general household guidance, use refrigerated leftovers within 48 hours or freeze them if that is unlikely. This is general handling guidance, not a storage period established by testing this particular recipe. Reboiling food that has been left out does not restart a storage clock.
Reheat only the portion you need, until steaming hot throughout, and reheat it only once. On the hob, add a little water to prevent the bottom catching. In a microwave, use a loosely covered container and rearrange the pieces partway through so the center heats evenly. Follow your appliance instructions for standing time. Freezing and thawing can make the radish softer and release extra water.
References and more Korean side dishes
Method reference: Jecca Chantilly’s Korean Braised Radish illustrates evenly cut radish cooked under a lid. That is a different, spicy recipe; this page uses its own mild 400g ingredient quantities, thinner slices and center-based checks. The wording and images were created separately. Storage reference: Food Standards Agency: Cooking your food, for general leftover handling. Sources checked on November 10, 2026.
For a crunchy preparation of the same vegetable, see musaengchae, a Korean radish salad. For a different braised vegetable, try soy-braised potatoes in English. Potatoes and radish soften differently, so follow each recipe’s own doneness checks. Browse more K-Food recipes · 한국어 무조림 레시피
답글 남기기